Embroidered Cosmetic Bag: Minimum Size and the Right Backing
An embroidered cosmetic bag fails in one of two ways, and both are decided before the first stitch is laid. Either the artwork was drawn at a size the needle cannot resolve, or the cloth underneath was not stabilised and the panel puckered around the motif. Neither problem is visible in a digital mock-up, and both are obvious on the second pouch.
This guide covers what actually limits embroidery on a small pouch, the three ways a motif goes wrong, and the figures worth specifying so that the proof you approve is the one that gets stitched in production.
What Limits Embroidery on a Pouch
Embroidery is a thread drawing, and thread has a width. Every limit below follows from that single fact: the smallest feature a needle can render is roughly 1.2 mm, so anything finer becomes a solid line of thread with the gaps closed up.
- Minimum letter height — 6 mm on canvas and 5 mm on a tight nylon. Below that, the counters of a, e and g fill in and a lowercase name reads as a block.
- Minimum stroke width — 1.2 mm for a satin stitch, 1.5 mm for a fill. A hairline serif drawn at 0.6 mm will be skipped or thickened, and either result changes the letterform.
- Backing for the cloth — canvas needs a cut-away backing that stays in the pouch; nylon needs a tear-away that is removed after stitching; a thin lining needs a water-soluble film because nothing else will hold it.
- Distance from a closure — 15 mm minimum between the motif edge and a zip tape. Closer than that and the stitching stiffens the tape, and the slider catches on it.
- Colour count — each colour is a thread change, and thread changes are the part of embroidery that sets the run rhythm rather than the stitch count.
The table gives working minimums for the cloths used most often in pouches.
| Cloth | Minimum letter height | Backing that works |
|---|---|---|
| 10–12 oz canvas | 6 mm | Cut-away, 60 g, left in the pouch |
| 600D polyester | 5 mm | Tear-away, removed after stitching |
| Nylon, 420D | 5 mm | Tear-away plus a light spray adhesive |
| PU leather | 7 mm | Cut-away only; a tear-away leaves visible holes |
| Coated film pouch | Not suitable | No backing holds a film; use print instead |
Three Ways a Motif Goes Wrong
All three are decided in the artwork file or in the sample-room setup, which is why they are cheap to prevent and expensive to correct.
The design was scaled down instead of redrawn
A logo drawn for a 60 mm panel, reduced to 35 mm, keeps its proportions but loses its gaps. Strokes that were 1.5 mm become 0.9 mm and are stitched at the minimum the machine can hold, which closes the spaces inside letters and fills the detail in a crest. The fix is a separate digitised file for the small size with simplified detail and a heavier stroke, not a percentage change to the large one.
No backing was specified and the panel puckered
Every stitch pulls the cloth towards the needle, and a panel that is not stabilised absorbs that pull by gathering. A dense fill over 40 mm will visibly bow a canvas panel and leave a ripple that no amount of pressing removes. The backing is not optional and it is not interchangeable: a tear-away under a canvas panel does not hold it, and a cut-away under a thin nylon leaves a stiff patch inside a soft pouch.
The motif was placed too close to the zip
Embroidery stiffens whatever it crosses. Placed within 15 mm of a zip tape, it turns a flexible edge into a rigid one, and the slider either drags or the tape lifts at the corner. This is a drawing decision, and the drawing usually comes from a brand sheet rather than from the pouch pattern, which is exactly why it gets missed.
Proof the longest name at the smallest size
Most embroidered pouches are approved on a short sample name, and most failures involve a long one. Send the longest string in the list, stitch it at the size the smallest version will use, and approve that. If the pouch carries a fixed-width panel, the longest name is also the test of whether the artwork fits at all rather than of how it looks.
Embroidery, Print or a Woven Label
Three decoration routes compete for the same 60 mm of pouch panel, and the choice is decided by how much detail the artwork needs rather than by which one looks better in a proposal.
- Embroidery wins on texture and wear — it survives abrasion, reads as a considered product and suits names, monograms and small marks. It loses on fine detail and on colour count.
- Print wins on detail and colour — a 0.3 mm line and unlimited colours at any size, provided the substrate accepts ink. It loses on abrasion, and on a coated film it must be reverse printed to last.
- A woven label wins on consistency — the same label on every pouch, identical between runs, with no digitising per size. It loses on placement, because it has to be sewn on and that means a seam or a stitch line.
The boundary sits in two places. Artwork with more than four colours or features under 1.2 mm belongs in print or on a label. A mark that must survive years of handling and look stitched belongs in embroidery. When a design needs both, the usual answer is a woven label inside and embroidery outside, which also gives the pouch two touchpoints at different scales.
Five Lines for the Specification
These five make the difference between a motif that is stitched as drawn and one that is interpreted at the machine.
- Letter height and stroke width, both in millimetres — the height alone does not fix the stroke, and the stroke is what closes up first.
- Stitch type per element — satin for a name, fill for a block, run stitch for an outline. Mixing them without saying so produces a motif that looks uneven rather than wrong.
- Backing type and weight — cut-away at a stated weight for canvas, tear-away for nylon. Naming the cloth without naming the backing leaves the decision to the sample room.
- Position with a reference point — distance from the zip tape and from the side seam, not "centred on the front". Centred on what becomes a question when the panel is asymmetric.
- Thread reference and colour count — a thread code per colour, because a brand colour converted from a screen value drifts, and the number of colours sets how the run is sequenced.
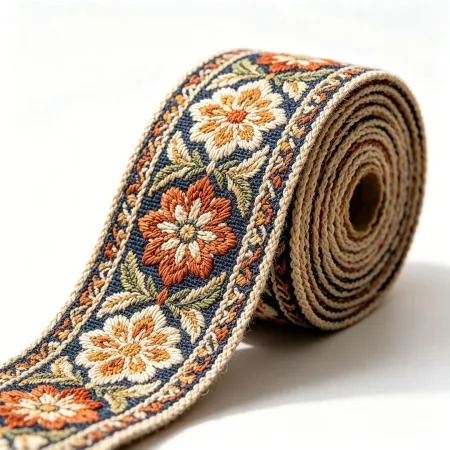
Embroidered pouches are developed inside the custom spec bag programme, and the OEM and ODM page describes how artwork becomes a stitched sample. A finished reference is the embroidered cotton canvas bag, and any webbing handle or wrist loop is woven on the same site to 2000N+ break strength on the cotton webbing line.
FAQ: Embroidered Cosmetic Bag
How small can an embroidered name be?
6 mm for capitals on canvas, 5 mm on a tight nylon, and 7 mm on PU leather. Below those figures the counters close and a name reads as a shape rather than as letters.
Is embroidery more durable than print?
It wears far better because the colour is thread rather than ink sitting on a surface. What it loses is detail: a print can hold a 0.3 mm line and a hundred colours, and embroidery holds neither.
Why does the panel ripple around the logo?
Because the cloth underneath was not stabilised for the stitch density. A cut-away backing for canvas or a tear-away for nylon prevents it; a heavier thread on unstabilised cloth makes it worse.
Can embroidery go on a transparent pouch?
Not usefully. A film has nothing for the stitches to grip and no backing will hold it, so the motif pulls through. Transparent pouches take print, and the print has to be reverse-printed if it must survive abrasion.
How many colours should a motif use?
Three or four covers most logos, and every colour is a thread change that interrupts the run. Beyond five colours, a woven label or a print usually reads the same at pouch scale and behaves more predictably.
An embroidered cosmetic bag is limited by thread width, not by design ambition. Keep letters at 6 mm and strokes at 1.2 mm on canvas, name the backing rather than assuming it, hold the motif 15 mm clear of any zip, and proof the longest name at the smallest size. Those four decisions live in the artwork file, and correcting them there costs nothing compared with correcting them after a run.
Why Xinxiangrui for Embroidered Cosmetic Bag
An embroidery proof is the only honest way to approve a stitched pouch, and at Xinxiangrui Webbing the proof is stitched on the cloth the order will use rather than printed on paper. Artwork is digitised per size, Pantone matching is done against the actual substrate, and free samples come off production settings rather than a bench. Development, decoration and the webbing trim — woven to 2000N+ break strength — sit on one site. Share your pouch details with us and we will come back with a matched sample.